Schedule timeline actions
Use the timeline to make surveys and file packs available at specific points in the video, remove them from the tool list, or open one for attendees.
Prepare the timeline
- Join the studio and open Configure player.
- On Player, select your media, surveys and file packs first.
- Open Timeline. Each selected survey or file pack gets a lane.
- Set Available at start to the tools participants should see at the beginning.
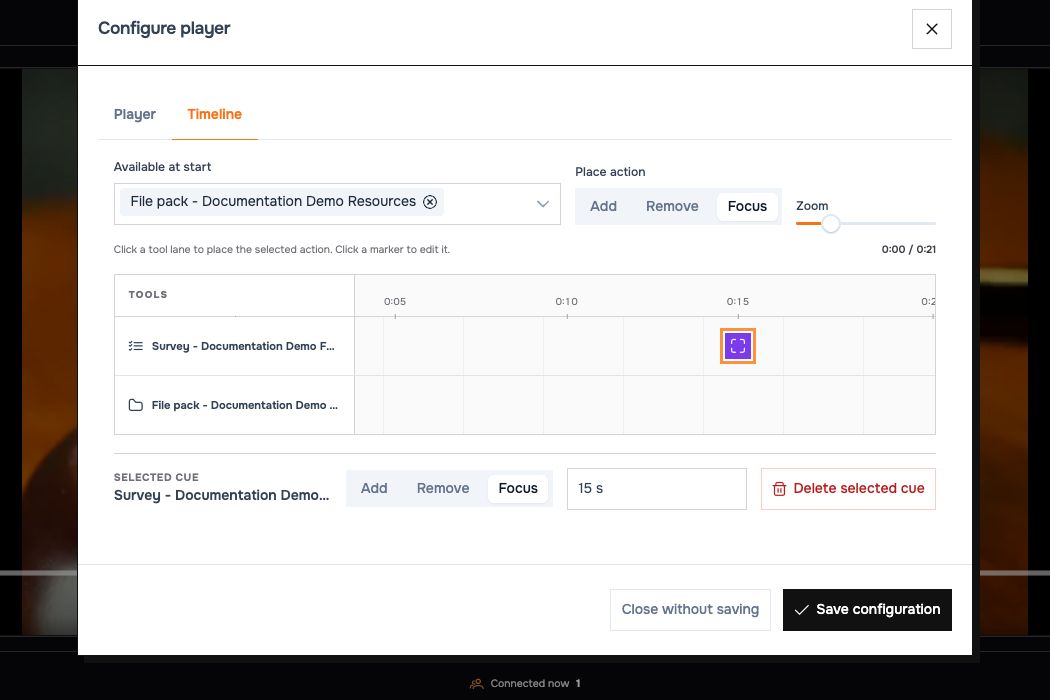 Each lane belongs to a survey or file pack selected on the Player tab.
Add or adjust a cue
- Choose an Action to place.
- Click in the intended tool's lane at the approximate video time.
- Select the resulting cue. Adjust Selected cue action or Selected cue time for precise timing in seconds.
- Repeat for the other tools, then select Save configuration.
| Action | What attendees experience |
|---|---|
| Add | The tool becomes available in the player tools. |
| Remove | The tool is removed from the available tools; its underlying survey or file pack is preserved. |
| Focus | The tool is made available and brought into focus for participants. |
Use Delete selected cue to remove a cue and save the configuration to apply the change. Use the timeline's zoom control to work with closely spaced cues; scroll horizontally when zoomed in.
Rehearse the sequence
For the demo, make the resources available at the start and add a Focus cue for feedback near the video's end. Play through the cue and check the visible result. Keep cue times within the video's duration.
Seeking changes the playback position used to determine available tools. Seeking backward can restore earlier availability; a pause stops timeline progression with playback. Do not assume that a tool remains available forever after its first appearance—later remove cues can hide it.
If the lanes are empty, return to Player and select surveys or file packs. If the survey opens but does not accept answers, check that it is Active.
Related: Surveys, file packs, live room.