Find your way around
After signing in, Overview shows a getting-started checklist and shortcuts to your workspace. Expand or collapse the checklist; completed steps reflect resources already in the account.
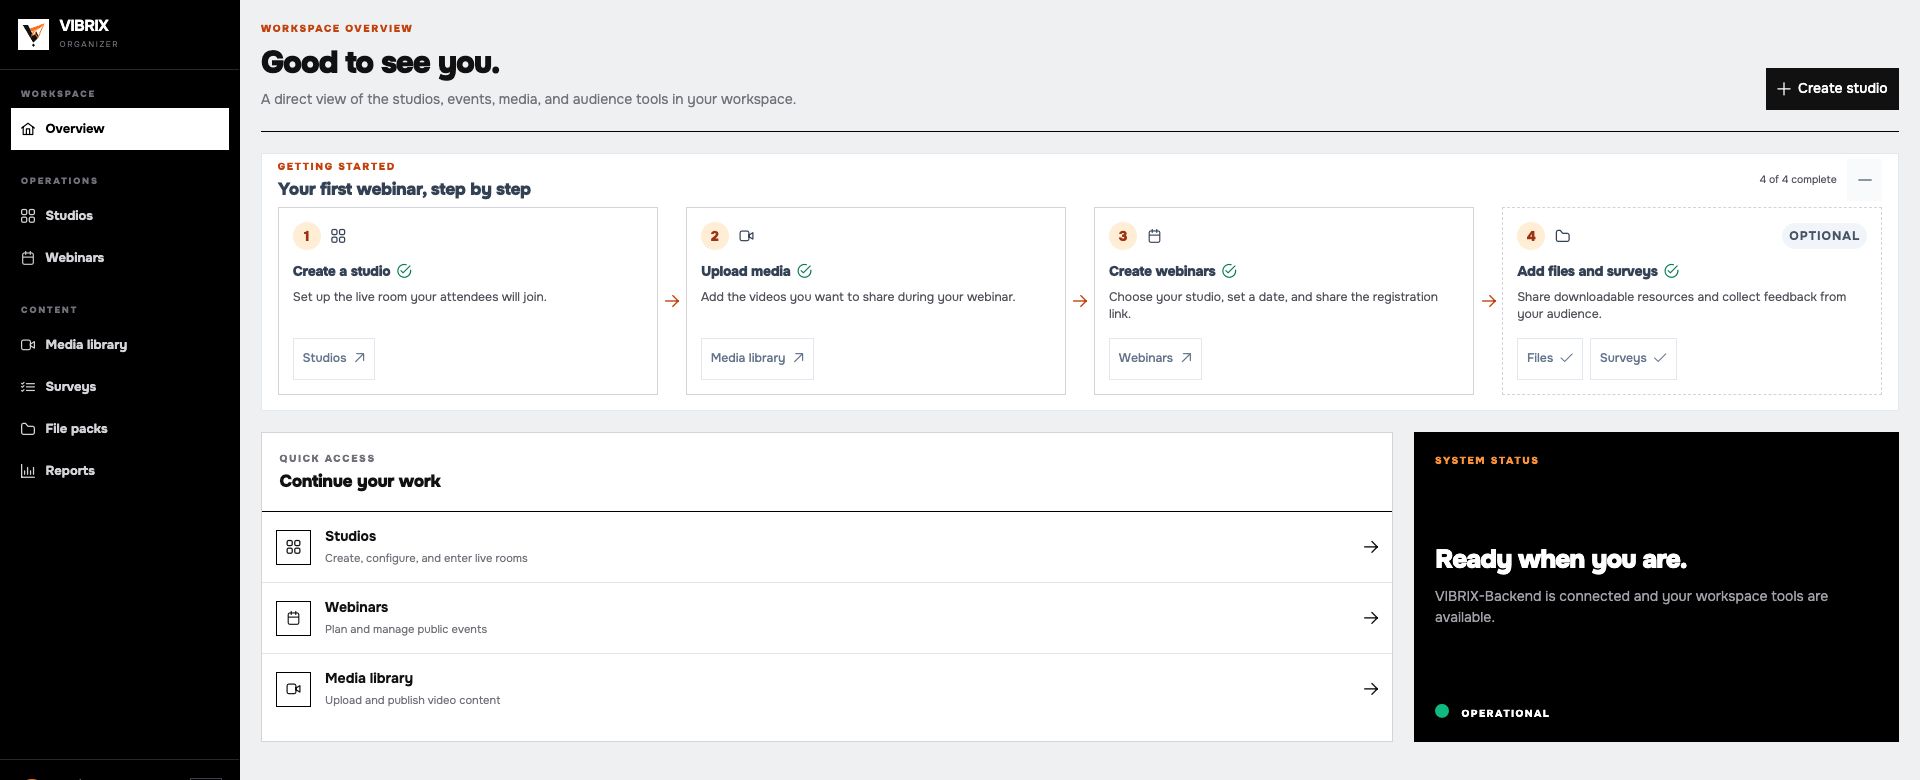 The checklist links directly to each part of your first webinar setup.
Studio or webinar?
| Term | What it does |
|---|---|
| Studio | The live room: selected video, playback, surveys, files, chat and connected participants. It can be reused. |
| Webinar / event | The scheduled session: title, studio, date, registration page, capacity, emails and reports. Some buttons say “event.” |
| Media library | Stores videos for use in a studio or through an expiring watch link. |
| Survey | A feedback form you can activate and attach to a studio. |
| File pack | A named collection of downloadable files you can attach to a studio. |
Create a studio before selecting it in a webinar. Upload your video and prepare surveys and file packs before configuring the studio player.
Use the sidebar
- Overview: checklist, shortcuts and backend connection status.
- Studios: create, edit and join rooms; check connected counts. The Overall Report button is currently a placeholder.
- Webinars: schedule sessions, edit settings and inspect registrations.
- Media library, Surveys, File packs: prepare and manage content.
- Reports: find webinar results and export them.
On a narrow screen, use the menu control to reveal the navigation. Reload or Refresh retrieves current data on the relevant page. If a page shows an error, wait for connectivity to return before retrying.
Next: Your first webinar.