Design your registration experience
Open Webinars → Edit webinar. Registration-page design and registration-form questions are configured separately.
Choose and preview a template
- Expand Registration page.
- Choose Editorial, Speaker or Image-led. Replacing an existing design asks for confirmation.
- Select Preview page to review the page and form without registering anybody.
- Select Back to page settings, then save the event to publish your changes.
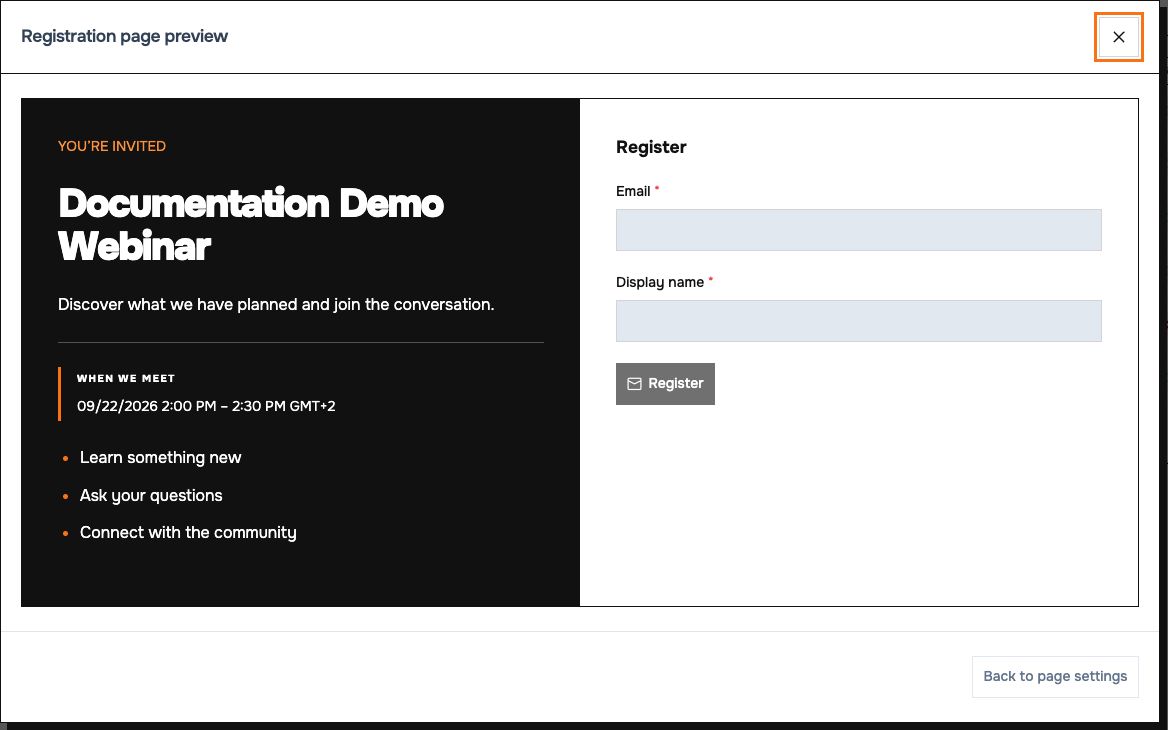 Preview combines the event's details and registration fields with its selected design.
Customize page content
Save a new webinar first. Then reopen it and select Customize page.
- Choose the Panel position and Preview size for your layout.
- Under Add content, add an event title, heading, paragraph, image, speaker, highlights, event details or divider.
- Select a block to edit its text and available appearance settings. Use Move block up, Move block down, Duplicate block and Remove block to arrange content.
- Set panel colors and any block-specific colors. Use Use panel colors to restore inheritance where offered.
- Upload JPEG, PNG or WebP images into the Event image library (up to 5 MB each, 20 images per event), select an image for a block, and provide meaningful alternative text unless it is decorative. Check cropping/fit in the preview. Uploads remain in the library even if you cancel editing.
- Use Undo last change and Redo last change as needed. Preview page switches to preview; Back to editing restores editing.
- Select Apply design to return the design to the event form, then Save event changes to make it live.
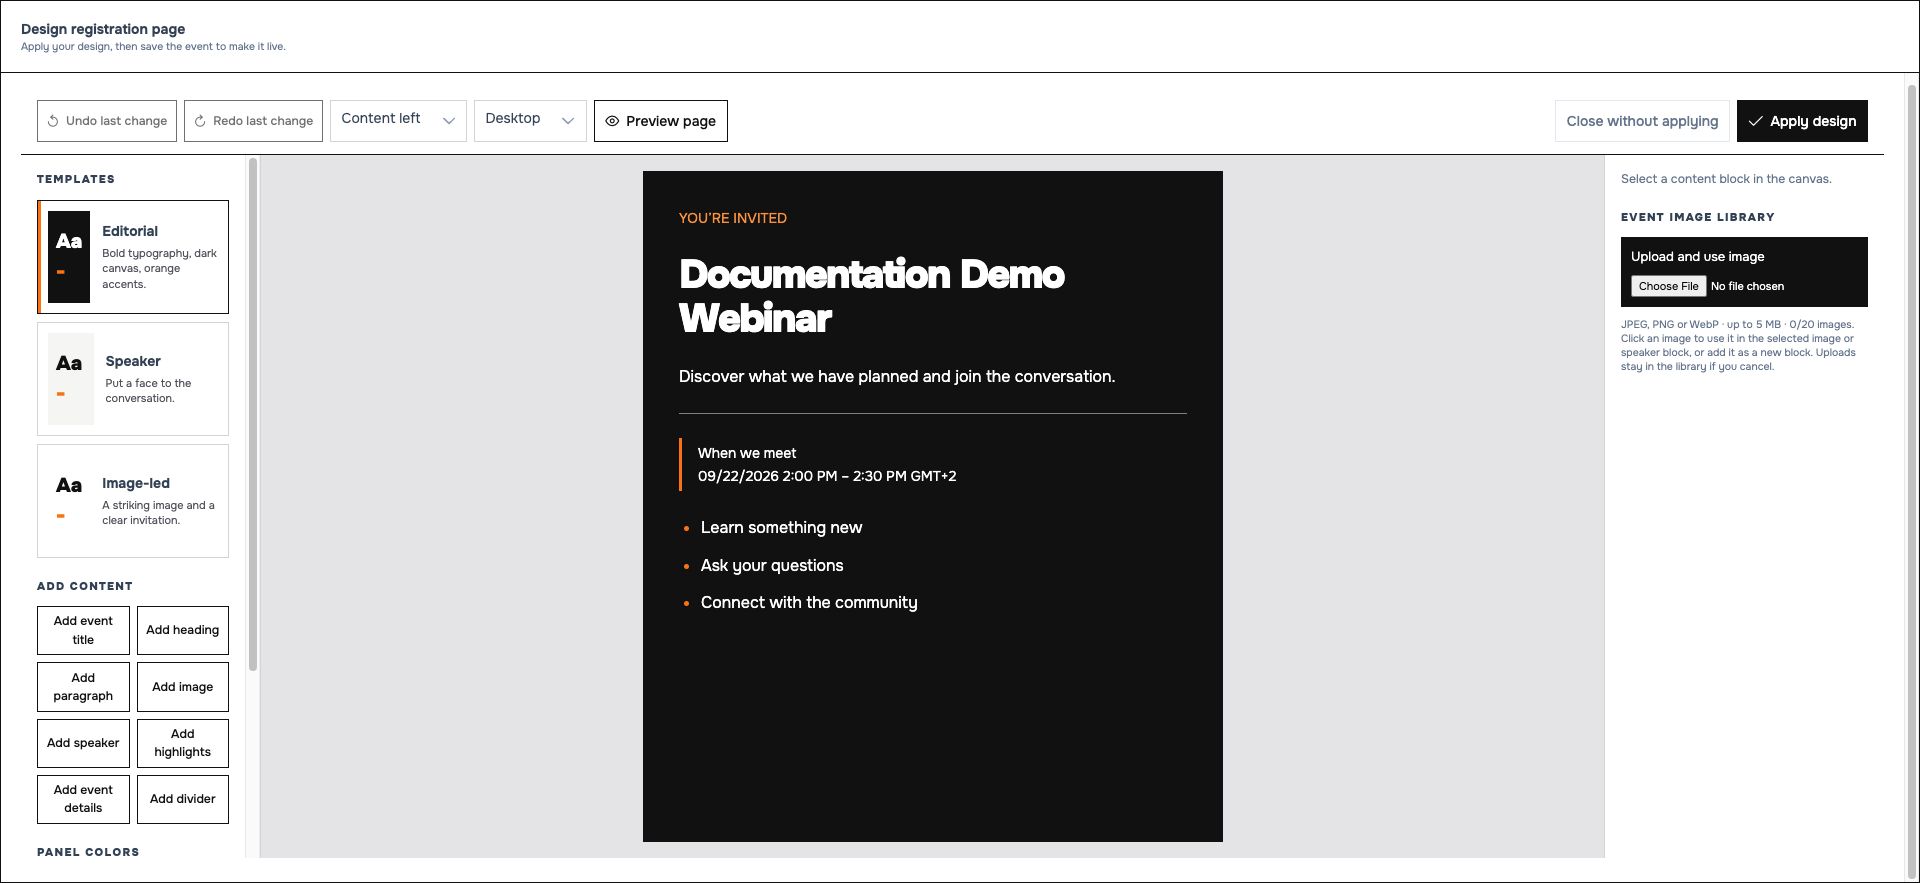 Applying a design and saving the webinar are two separate steps.
Close without applying exits the designer without applying the current draft. Uploaded images have their own delete action; review whether an image is in use before removing it. The registration form remains protected from layout editing.
Customize the registration form
- Expand Registration form.
- Review the required identity fields: Email and Display name. Their labels can be corrected, but they remain identity fields.
- Select Add field for an additional text, checkbox or rating question. Set its question, options/rating scale and whether it is required.
- Save the event and preview the page again.
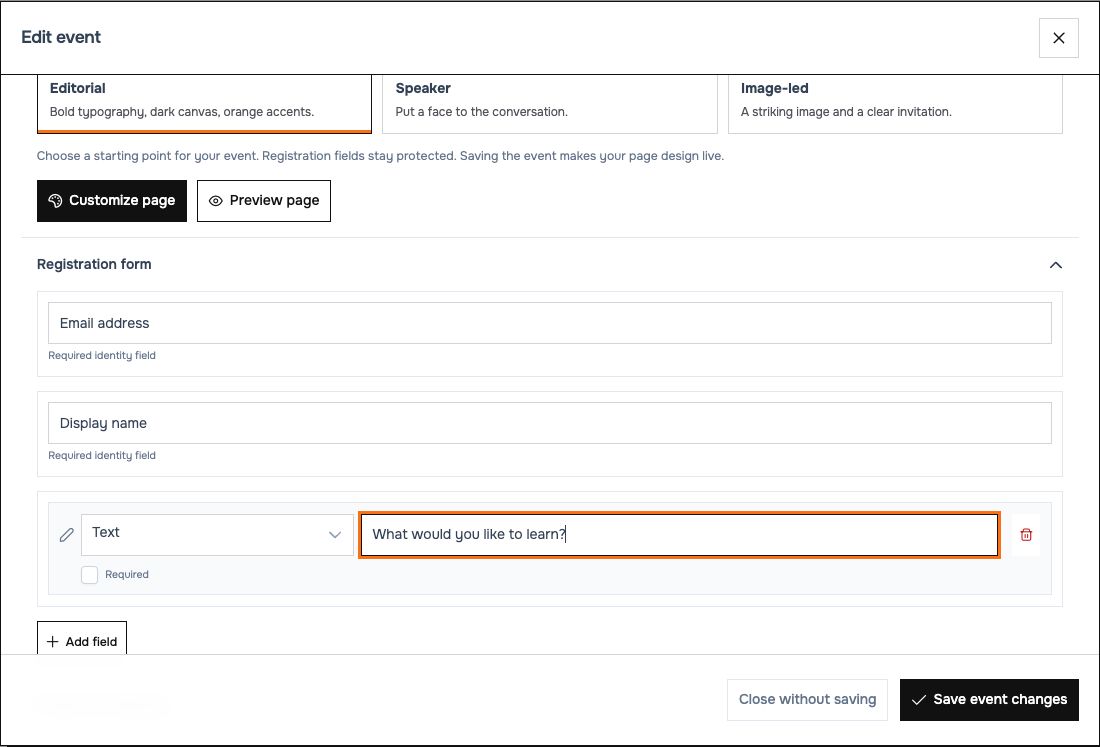 Required identity fields remain present; additional questions use the same types as surveys.
Once registrations exist, the field structure is locked. You can correct labels, but cannot add/remove fields or change their structure. Configure the form before distributing the link.